How to create your Shopify Account and give us access to work on it
1. Click on this link : https://shopify.pxf.io/LPVBjV
(It is important to click on this link and create your Shopify account using this link only)
2. Enter your email and click on Start free trial

3. Click on Skip

4. Click on Skip

5. Click on Skip

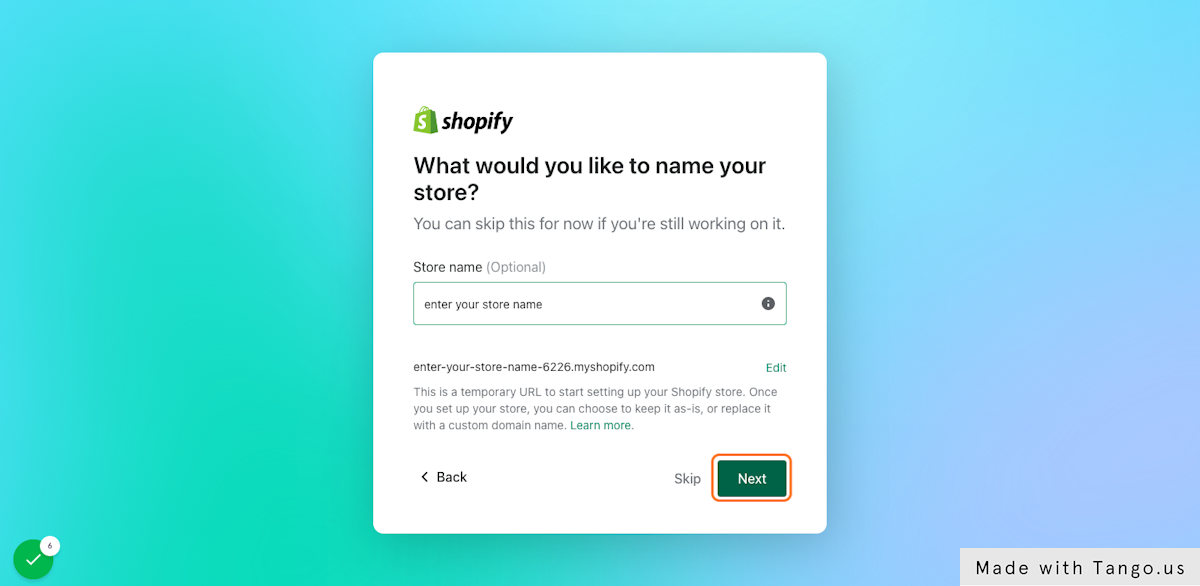
6. Type the name you want to use for your store and then click on Next
7. Select your country and click on Next

8. Click on Continue with Email

9. Enter your password

10. Click on hCaptcha checkbox and complete the challenge.

11. Click on Create Shopify ID

12. Click on your Shopify account.

13. Your store will be created and your store dashboard will appear.
14. Click on Pick a plan

15. Click on Choose this plan

16. Click on Confirm billing cycle.

17. Enter your address details and then click on Save address

18. Add your card information: card number, expiry date, and CVV

19. Click on Add credit card

20. Click on Confirm billing cycle
