
A 10-step system to scale product photography and copywriting with a smartphone. Build conversion-ready product pages fast. Learn the workflow and tools.
Local retailers do not have time to become studio photographers or long-form copywriters. The good news is that you do not need to. With a modern smartphone, a simple repeatable workflow, and a few smart templates, you can build conversion-ready product pages for 100 or more SKUs in days, not months. This guide shows you exactly how to do it, backed by UX research and platform best practices, and it maps where a turnkey partner like StoreStudio can plug in to get you live fast.
Why smartphone-first works for modern ecommerce
If you have been waiting on a DSLR or an agency, do not. Today’s phones can capture sharp, high dynamic range images that meet marketplace and ad platform standards. The step-by-step tutorial in Shopify’s phone product photography guide shows how to get pro-looking results with natural light and a basic setup. Conversion research aligns with that practicality. Users need clear, zoomable images and a variety of angles to trust what they are buying, which is why Baymard’s product page research emphasizes high-resolution galleries, robust zoom, and image types that convey scale and detail.
Speed also matters. Faster pages drive more completed checkouts, and images are a major driver of load time. Google and Deloitte found that even a 0.1 second improvement in mobile site speed increased retail conversion rates by 8.4 percent according to the Milliseconds make millions case study. That means the images you create should be high quality and also optimized for performance.
The 10-step production system for 100+ SKUs
1) Plan your catalog and shot list
Start with a spreadsheet. Group SKUs by product type and determine the minimum viable images and attributes needed for each group. For example, apparel might require front, back, detail, and on-body or in-scale shots; hardware might need size-in-context and close ups of key features. You also want a copy template that captures key specs and benefits without bloating the page.
Structure matters for copy. Instead of a single block of prose, Baymard’s guidance on description structure recommends leading with concise highlights, then a scannable spec list. This format helps shoppers quickly see if the product fits their needs.
For spec-heavy items, make sure your list is grouped and readable since Baymard’s 2025 product page best practices note that medium and long spec sheets should be organized for scanning. Decide now which fields you will collect for every SKU such as dimensions, materials, care instructions, compatibility, and warranty.
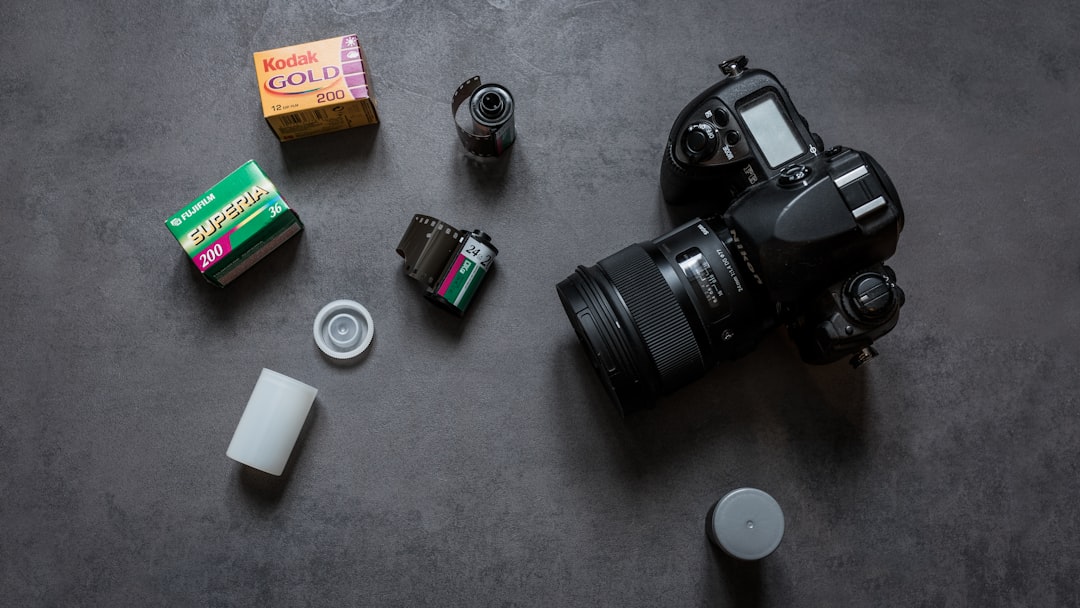
2) Build a simple photo station you can leave in place
You do not need studio gear to produce consistent images. A small table near a window, a large sheet of white poster board or foam core for a sweep, and a phone tripod will take you far. If your space has uneven light, add two identical inexpensive clamp lights with daylight bulbs placed at 45 degrees to reduce shadows.
When your marketplace requires a pure white background, use a white sweep or a lightbox. As a reference point, Amazon’s product image guide mandates a pure white background for main images to keep search results consistent. For advertising and Google listings, submit high-resolution images, because the Google Merchant Center product data spec asks for the largest full-size images you have that accurately show the product.
3) Dial in your phone settings and framing for repeatability
Consistency lets you scale. Turn on grid lines to align horizons, lock focus and exposure by long pressing on your subject, and avoid digital zoom which reduces quality. Shoot slightly wider than you need so you can crop consistently later. If you are using natural light, turn off mixed indoor lights to avoid color casts. The practical techniques in Shopify’s smartphone photography walkthrough are a solid baseline for exposure and composition.
Document your settings for every product type. Example: “Mugs get eye-level hero, 45-degree angle, handle right, detail of rim, lifestyle with hand for scale.” That single sentence becomes your on-set checklist.
4) Shoot a standard angle set plus one proof of scale
Your core set should cover identification, detail, and context. Baymard outlines seven types of product images that help bridge the sensory gap that shoppers feel online. At minimum, aim for: a clean hero against a neutral background, a back or alternate view, two or more close ups of texture or key features, and an in-scale image that shows size relative to a hand or everyday object. The in-scale shot reduces sizing uncertainty, which Baymard’s research on in-scale images found to be critical for user confidence.
Shoot duplicates to protect against blinks, dust specs, or minor motion. It is faster to delete extras than to have to reshoot later.

5) Add simple lifestyle or social-proof visuals when relevant
Not every product needs a lifestyle scene, but a quick context shot on a neutral surface or a user generated image can help customers imagine ownership. When it is easy to source, adding authentic social photos to product pages increases decision confidence, and Baymard’s article on integrating social media visuals notes that many users look for this real-world perspective.
If you plan to syndicate to ad platforms or marketplaces, keep at least one main image clean and compliant, then use lifestyle images in secondary slots.
6) Batch edit for speed and consistency
Editing is where consistency is won. Choose one mobile app for batchable edits. In Adobe Lightroom, you can copy adjustments from one photo and paste them to many, which Adobe’s batch edit overview explains for copying and syncing settings. Create a few saved presets per product family such as a white balance preset for studio lights and a contrast preset for natural light.
Keep your edits light. Correct exposure and white balance, crop to a consistent aspect ratio, and lightly increase clarity for texture. Over-editing can lead to unrealistic colors that look different on arrival, and high compression can introduce artifacts. Export at a size that balances quality with speed. If your platform handles responsive images, upload the clean high-resolution original and let the theme deliver smaller variants.
7) Name files smartly and optimize alt text and image SEO
Your image workflow is also an SEO workflow. Use descriptive file names that include the product and variant name such as blue-stoneware-mug-12oz-hero.jpg rather than IMG_4021.jpg. Google’s own image SEO best practices recommend descriptive filenames and alt text, and the SEO starter guide reiterates adding high quality images near relevant text.
Write alt text for meaning and accessibility, not keyword stuffing. Example: “Blue stoneware mug 12 ounce, side view showing handle shape.” If your product pages include structured data, you can enhance visibility with Product markup so that price and availability can show in rich results. Google’s Product structured data guidelines explain the required and recommended properties, including image references.
8) Write conversion-focused copy once, then scale with templates
Your copy system should fit on one page and be reusable. Start with a short benefit-led paragraph that answers why this product is right. Follow with a bullet list of the top 5 to 8 highlights, then a grouped spec list. This mirrors Baymard’s recommendation to structure descriptions by highlights, which helps shoppers engage without wading through walls of text.
Include what buyers worry about most. Clear size info, materials, care or installation steps, and what is included in the box reduce post-purchase surprises. Prominently link to shipping and return details since Baymard’s product page research library documents that users look for this information before deciding.
If writing 100 descriptions feels daunting, you can draft in batches using a prompt template, then refine manually. Merchants on Shopify can leverage AI tools that generate first drafts for product descriptions, which the Shopify Magic overview highlights as built-in to help with ecommerce content. Keep human review in the loop to ensure accuracy and brand voice.

9) Publish fast with bulk import, synced inventory, and compliant images
Once your photos and copy are ready, speed to live matters. Most retailers can launch quickly on Shopify since it balances ease of use with scale. If you are starting fresh, consider setting up a store on Shopify so you can import products, manage payments, and integrate local delivery in one place.
For catalogs of 100 or more SKUs, prepare a CSV import with one row per SKU, columns for title, description, price, inventory, and image URLs. Shopify’s CSV import guide explains the required fields and how to attach multiple images per product. If you are running local ads or free listings, ensure your images meet feed standards by following the image_link attribute requirements that Merchant Center uses to render your products across Google.
When you need fast background cleanup or on-brand backgrounds at scale, Shopify’s recent Winter Edition introduced an AI-powered image editor that can generate clean or themed backgrounds, which TechCrunch’s coverage describes as part of the platform’s built-in tools. Use this sparingly for speed, and keep your main images accurate and compliant for ads and marketplaces.
10) QA and measure what actually moves conversion
Before you go live, sanity check every page. Confirm zoom works and images are crisp at full size since Baymard’s findings on image resolution and zoom show that insufficient zoom remains a common issue. Run a small pass on mobile to ensure images load quickly and content does not shift while loading.
Then measure. Faster pages correlate with more sales, and even small wins matter. The Google and Deloitte analysis noted earlier quantified meaningful conversion lifts from tiny speed gains in retail according to the Milliseconds make millions study. Beyond speed, prioritize reviews and Q&A. When reviews are displayed, conversion can rise dramatically, as the Spiegel Research Center reported with up to a 380 percent increase for higher-priced items as review volume and visibility grow. Add a simple post-purchase request for reviews and feature the best ones on product pages.
If you rely on Google listings, stay current on feed changes. The 2024 Merchant Center product data spec update outlines how Google updates policies and fields annually, which can affect what images and attributes are recommended or required.
As you learn, update your shot lists and copy templates, not each page manually. This is what keeps your system scalable.
Where StoreStudio fits in your scale-up plan
If you would rather focus on customers than CSVs and camera angles, partner with a team built for speed. StoreStudio specializes in turning physical inventory into a ready-to-sell storefront quickly, including design, build, and technical implementation, plus inventory synchronization and local delivery integration out of the box. The service is managed end to end and designed for busy owners who do not want to wrestle with plugins or APIs.
You can hand off as much or as little of the workflow as you want. That might mean StoreStudio sets up your store, configures collections, and builds a brand-aligned theme while your team captures smartphone photos using the steps above. Or it can be everything from product intake to go live, with ongoing support to keep operations smooth. Explore the team’s approach on the About page, browse practical guides on the blog, or start a conversation via Contact to map your catalog and timeline.
The takeaway is simple. With a phone, a checklist, and a repeatable copy template, you can publish conversion-ready pages at scale. The research says shoppers want clear, high-resolution images, scannable benefits and specs, fast load times, and visible reviews. The workflow above delivers that in a way your team can run weekly, and partners like StoreStudio make sure the plumbing, design, and integrations are ready on day one.


